Friday, October 30, 2009

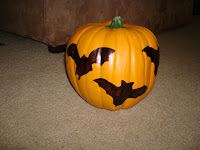
Reusable Pumpkin Art

In the fall, I really enjoy driving down the road and looking at everyone's natural fall decor (the beautifully colored leaves) and other outdoor fall/halloween decorations. However, until now, I haven't had any of my own other than a yard full of leaves from the 2 huge trees in our yard.
After reading a few of my favorite blogs (this one, this one, and this one) learning all about their fall decorations or favorite fall things, I got inspired. Last weekend, I went to Michael's and they had their fake pumpkins, both orange and white, on sale. I purchased two of them, one large white one and one medium orange one...which Julie proceeded to carry (and drop) around the entire store...pretty cute.
This week I did some simple internet research for some pictures and letters to trace or copy and then I started work on them this afternoon. Here are my supplies (the bats I printed off of one of the blogs and then cut out; the G, for our last name, was found with a Google search).

The next step was to tape the letter and pictures into place on the pumpkins...which is tricky when my kid wants to sit on my lab and "help". But we managed to get it done!

Then I simply took a pen and traced the images (I did only have 2 bat cutouts, but just traced them once and then moved the bats and traced them again).

Then I took the papers off and using a Sharpie, traced and colored in the G and the bats.

Finally, I just finished the white one up with some free-hand-drawn bugs and worms. Here are the final products.

Here they are, now decorating my tiny porch beautifully!


The whole process only took me about an hour today...easy peasy!!!

Sunday, October 25, 2009

Date Night

For those who know me, you know my beautiful baby girl. Julie is a real blessing but has also been a real challenge...and sometimes we just need a break to get away.

Last night, Stuart's mom and sister came over and watched Julie, allowing Stuart and I a chance to go out to a movie and then dinner...with grown up conversation. I am so thankful to have family close by that is willing to spend their evening with my baby. It was such a blessing to take time away and just spend some time together as husband and wife.

So, thank you both so much for helping us out and giving us a night off. You amazing!!

Friday, October 16, 2009

Major Home Improvement Project #1

This post has been a long time coming...but for me it has been well worth the wait. However, I am sure that you missed me greatly over the last few weeks. (at least I hope so!)

We recently replaced our gas heat and window unit a/c with central heating and air. I had been dreading the winter with a 2 year old walking around with hot radiators in our house, but I dread no more!!! The radiators are no more. We decided to do dual zone heating and air since our house is so old that it had no duct work. The workers did the work over two weekends with one weekend off in between...needless to say our house was a bit messy for a few weeks, but again, so worth it! So below are the steps it took us to get it all installed.

Step 1: Take pictures of some of the radiators to show you a good solid before. Below see shots of our living room, dining room, and spare/play room. (Please note our radiator/window unit combo in the living room, lovely, huh??)


Step 2: A couple of weeks before the workers were scheduled to start their work, my wonderful husband had to remove all radiators (5 total), piping (both the gas pipes and the pipes from the furnace to the radiators), and the furnace from our house, as well as a small closet from the basement. This was no small or easy job. It took days of very hard manual labor on Stuart's part, as well as a couple days of help from his brother (thank you so much, Jesse!). Here are a few pictures after all of their amazing work. (We obviously have a bit of work to do on our walls thanks to radiators not being moved by our house's prior owners when painting...not to mention cracks in our plaster walls, but still a massive improvement already!!)

Step 3: Sit back while the workmen did their thing! They came one Saturday and worked most of that day and then came back Sunday for a few hours to finish the first floor heating and air. Below are pictures from Saturday night...they had all the holes cut in the floor, but didn't get the vent covers in that night. Julie was very interested in what was happening to her house. See her contemplating how she could "fall" into the hole in the kitchen without anyone noticing?? (yes, she actually fell into the one in our living room, with one leg, and it was funny...too bad I didn't have my camera at the ready)

And here are the pictures of the new vents in our floors.


After the almost 2 week break, the workmen came back for a little while Friday morning and then pretty much all day on Saturday to do the upstairs unit. Apparently, it was pretty tough with our limited attic/storage space but they did it! And got it completed right before a cold front came through...perfect timing, thank goodness!! Because the air handler for the upstairs in in our attic space, our vents are in the ceiling up there. See an example of those below.
And last but not least, here are some pictures for any of you who want to see the ugly stuff from our basement and backyard...first is the air handler for our first level and the last one is of one of the two heat pumps that now sit outside our basement door, along with my adorable baby girl and fabulously hard-working hubby.

So, that is the story of how we went from gas heat with hot radiators and window units to central heating and air. We love it and will highly recommend the guys who installed ours...if you need a name and live in the area, just let me know I will gladly share!